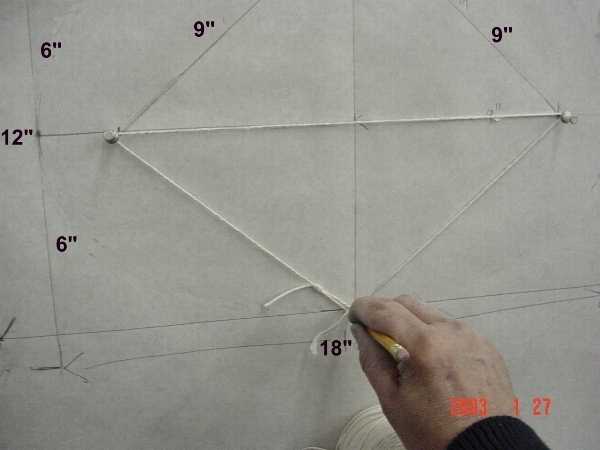
Then I removed the top tack and placed my pencil in the
loop, scribed a perfect oval around the two remaining pushpins see picture
below.
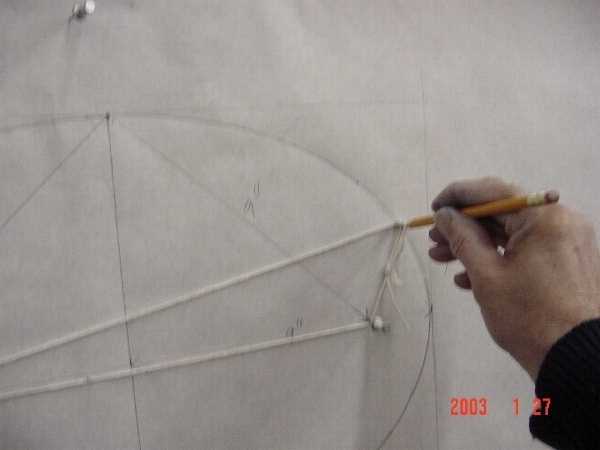
Then it is time to perforate as shown below.
I promised Terry Whynott, back
in December,That I would participate in an online Panel Jam. I wondered
for a month, what I could contribute that
everyone else didn't already know, He assured me that
there are all kinds of levels in our group and even the most basic stuff
would be good. I like basic
so I said ok.
I studied for about a month on
what I would do, with no inspiration.
Then a friend of mine(a fellow signpainter) came into
the shop with a problem,
He wanted me to make him a big pattern of an oval design
for a place in Galveston that he was bidding a job on.
I told him, well I could do that or you
could just get you a long piece of string and make your own. I took about
fifteen minutes and showed him how.
(He was so pleased, I had to back up to keep him from
hugging me!)
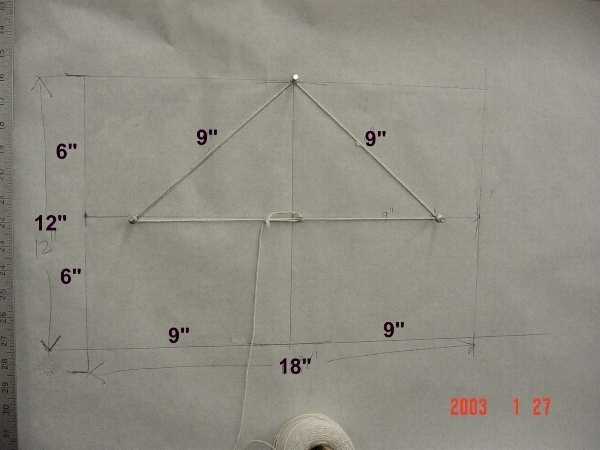
So I thought for my panel jam, I would start
with an oval. I started with a piece of paper, drew a rectangle 12 inches
tall by 18 inches long. found the center and drew a vertical and
horizontal line through it. Then on the top of the vertical line
I scored a line to match half the width of the rectangle ( this one being
9") on each side of the center, you could use a compass to do this, but
I just used a ruler and found the intersect of 9 inches.
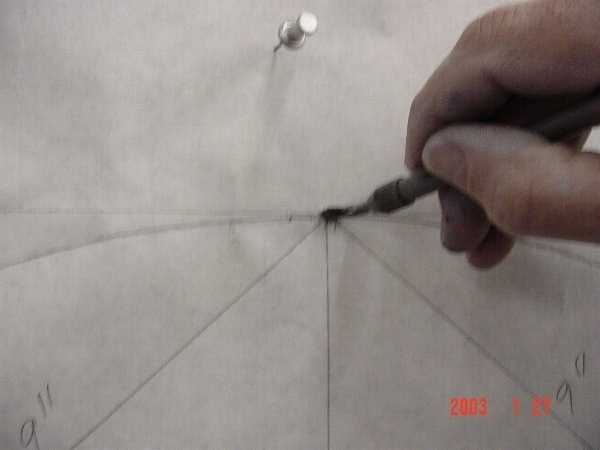
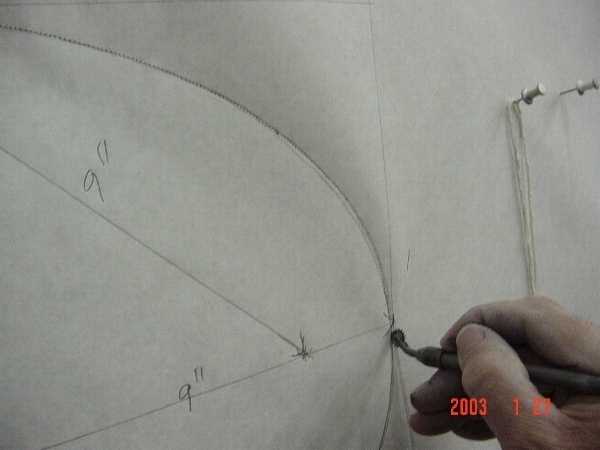
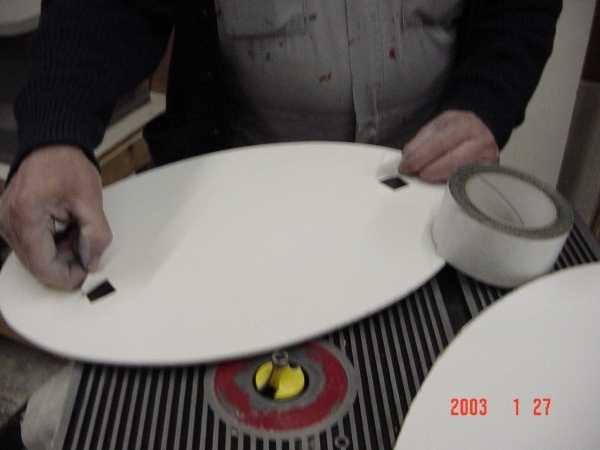
I then placed a push tack in each of the points plus
the top center point, wrapped them with a piece of household string and
tied it so I could use the loop in the tie for my pencil to glide in. see
picture below.
Then I removed the top tack and placed my pencil in the
loop, scribed a perfect oval around the two remaining pushpins see picture
below.
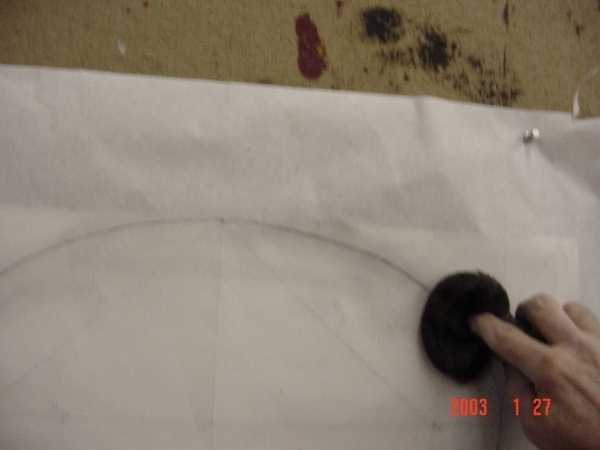
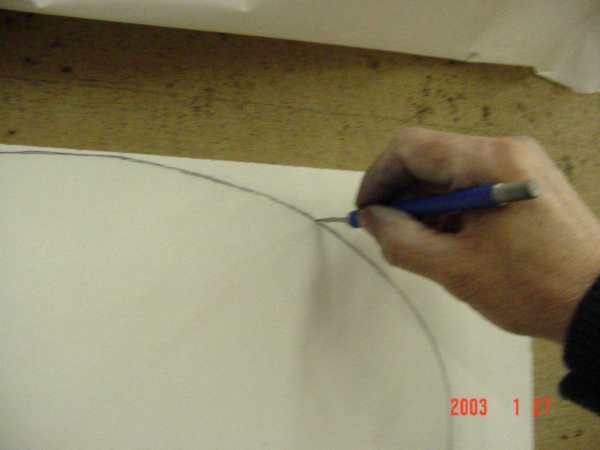
Then it is time to perforate as shown below.
Once perforated, turn the pattern over, the perforations stick up and it will pounce better, and Pounce on board.I use Fine Charcoal Powder in an old sock for my pounce bag. Just tape it on the end after filling, I like the terrycloth ones best.
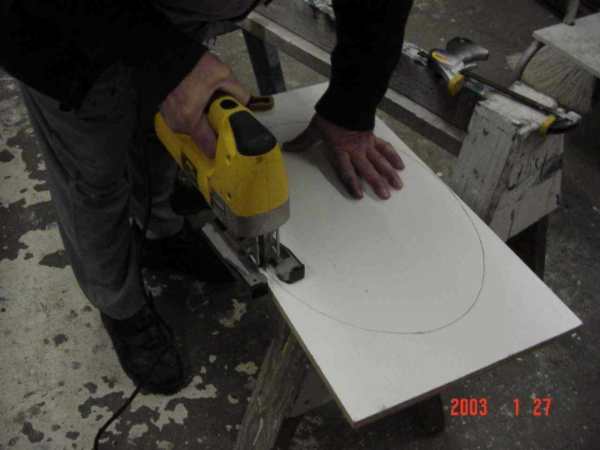
Now we are ready to knife trace for cutting. This keeps
the saw
from making a jagged cut in the duroply surface.
Items needed for cutting. Sabre saw, band saw or coping
saw.
quick grip clamp, saw horse and of course the old safety
glasses.
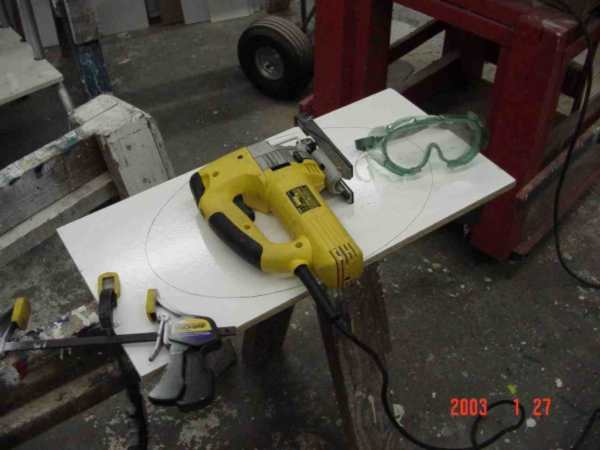
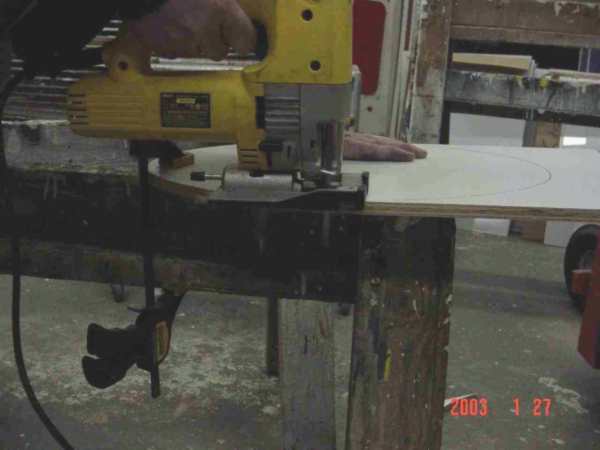
Notice the clamp holds the board on the horse and allows
you
to cut half at a time. Those clamps are a real time saver.
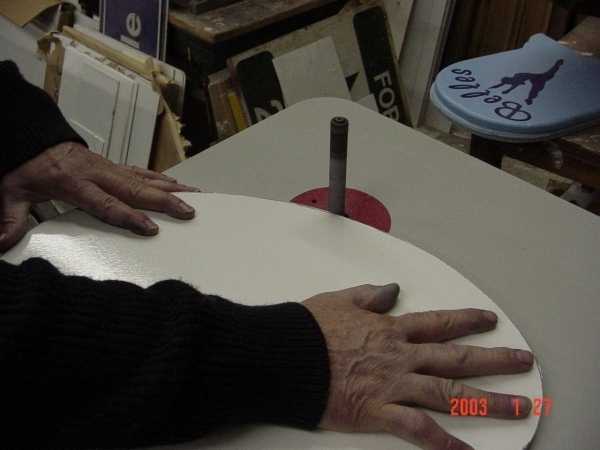
Now We need to put a routed edge on the ovals, so first
we must get
them smooth with the reciprocal sander, or you can use
a belt sander.
After sanding, we need to put the two ovals together with
some two sided tape for routing. That is just a shortcut
to give you a deep route and strength on the edge.
you can route one side and then flip and route the other
as shown.
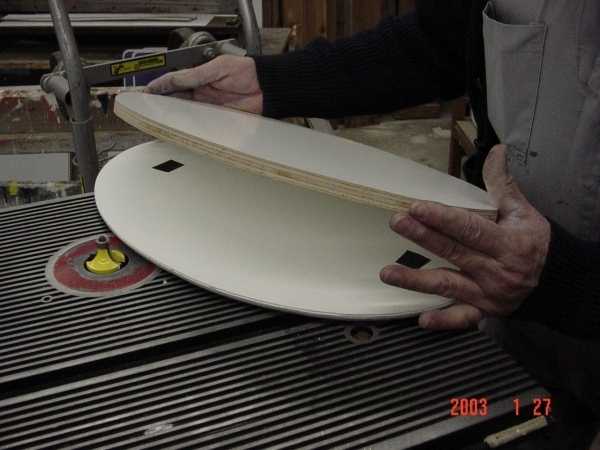
One oval was traced from the other, but there may be a
few flaws
in cutting, the routing will help eliminate those that
you didn't get from sanding.
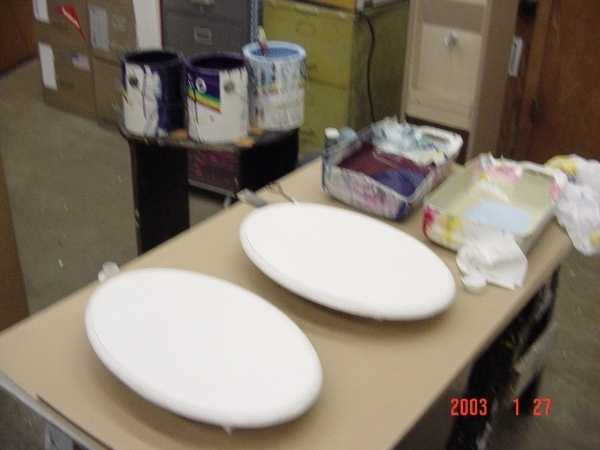
I don't have this on so you can see the bit, but you get the idea, notice the bearing on top of the bit fits between the two pieces. It would work on one piece, but would be a little weak if you had a soft edge, since we are doing two, it is better and faster to do them both at once.
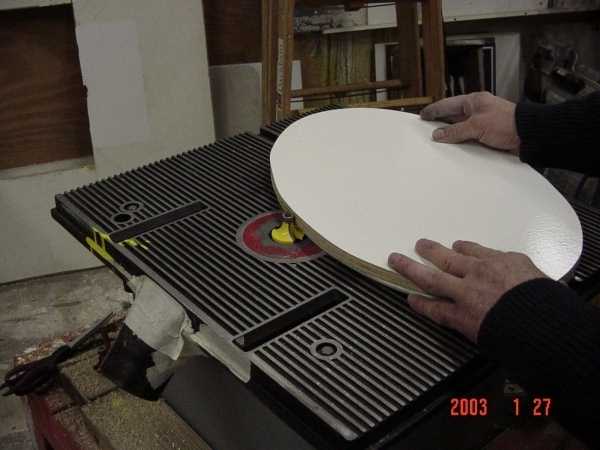
Once the boards are routed, primer
needs to be brushed on the raw edges.
I used KILZ primer.Or any Block out white will do. and
the prefinished board needs to be dressed down with a little sand paper
or steel wool. Sometimes I just scrape them with a razor blade turned up
on its edge.
![]()
Now we are ready to figure out
what we are going to put on these baby's.
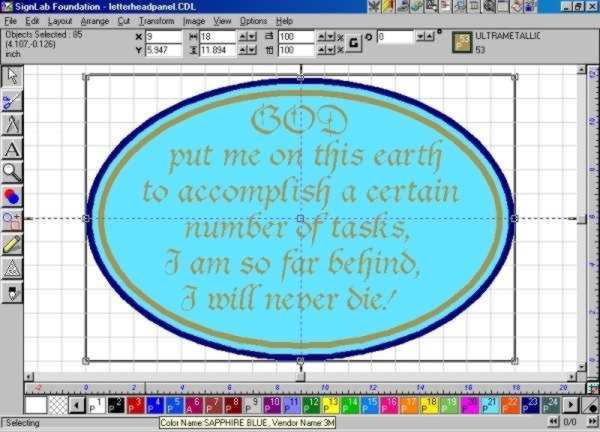
I chose signlab for the preliminary layout, as it has
lots of letterstyles and is easy to manipulate. I used Agincor font because
it is adaptable to hand lettering
or calligraphy all you have to do is outline it a bit
and slant it a bit and it if it doesn't fit your style, you can modify
it.
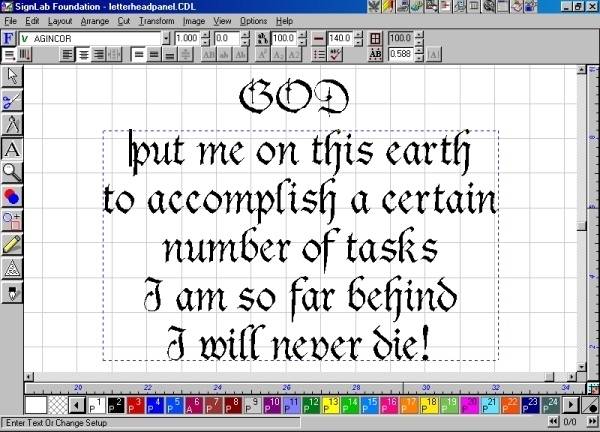
I like this saying, so I decided to put it on my panel.
But I want to slant it about 10 degrees, except for the
word God
Which I just outlined a bit.

Next I needed to put the ovals around it, In signlab that
is just a matter of
grabbing the circle tool, making one, giving it the measurements
you want and then inline it however much you want for your border or borders.
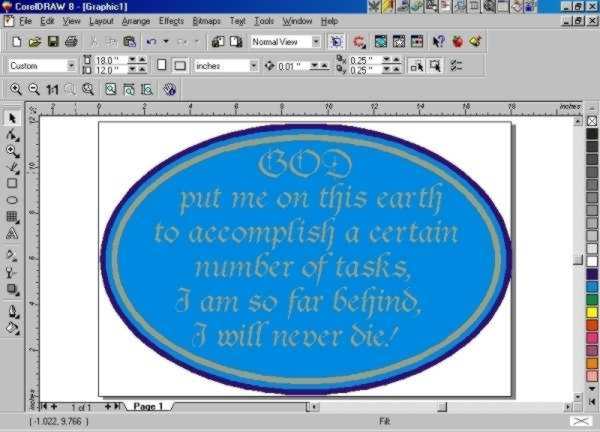
Now, since I don't have colormaster, or signlab e6 or
whatever they have now,
I have to switch to corel draw to get the Faux Finish
look, So I convert
my Text to curves and export as an ai file.
This is what I got from signlab by importing the ai file.
then it is just a matter of ungrouping and going to the
paintbucket and finding the right bitmap fill for the background, and a
better gold for the lettering.
Here is what I came up with,
Now this looks good enough to go by when I am doing my
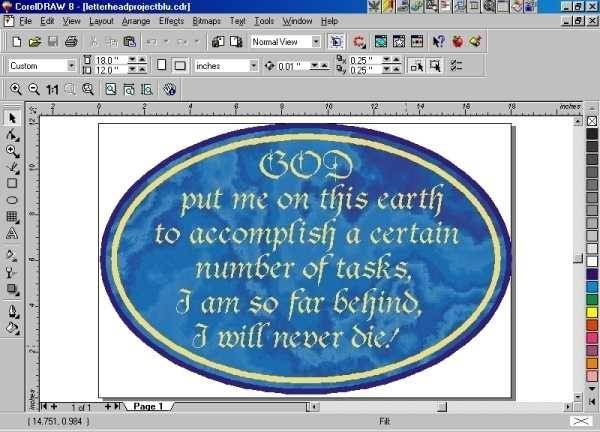
faux finish.
this background looks more like clouds than marble, but
the colors are what is important.
So lets paint!
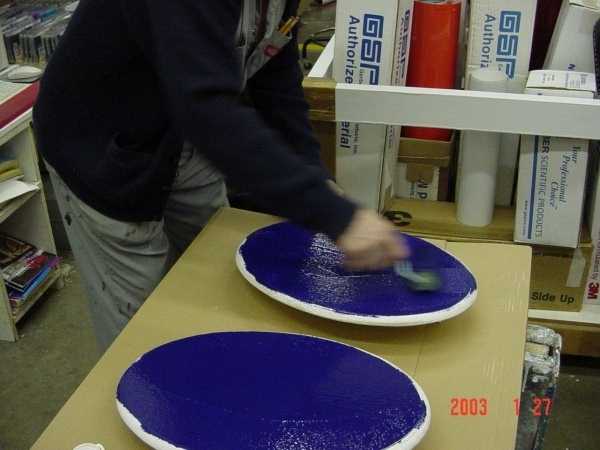
A thin coat of brilliant blue with the roller, leaving
the routed edges just primed
paint should be fairly thick but not so thick that
its bubbles don't disappear in a few seconds.
Immediately after I put on the blue I wadded up a plastic
bag and
put a little baby blue, in my homemade roller tray (
a thinner bottle split down the middle makes a great roller tray, and you
can reuse them for years.)
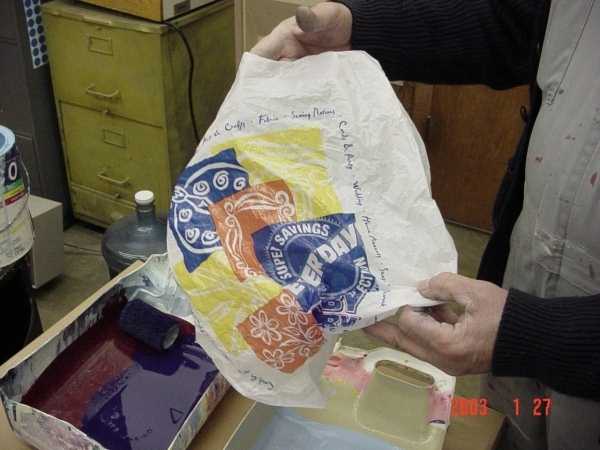
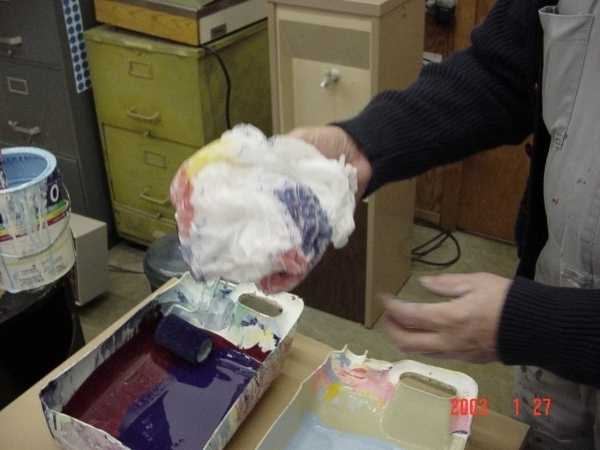
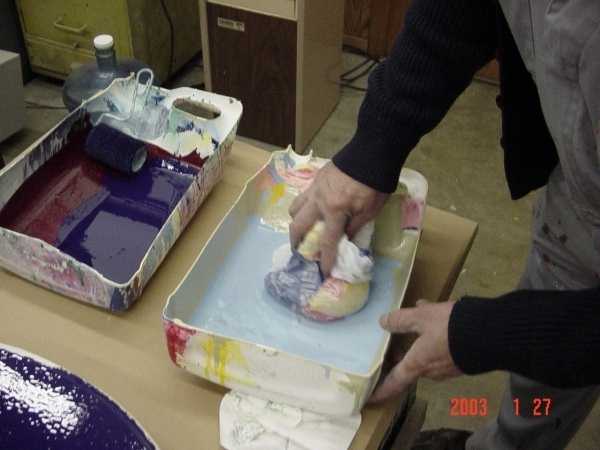
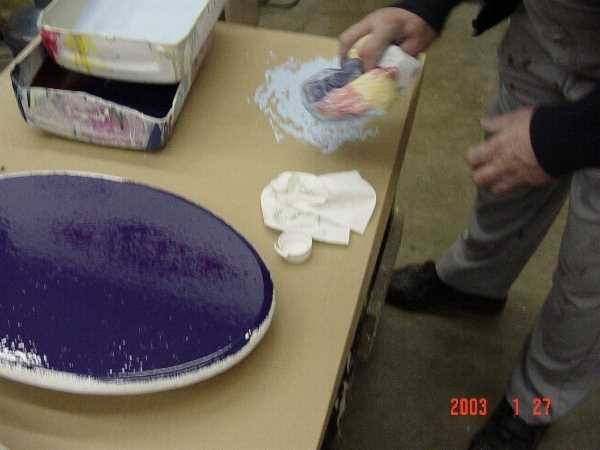
Don't be scared, Just go to town, quickly dab it around
till it looks almost good, then stop! let it blend a bit on its own, and
see what happens. I use
PICCO Bulleten Enamel, It is manufactured in Houston
and is comparable
to Ronan background paints. One Shot is a great subsitute!
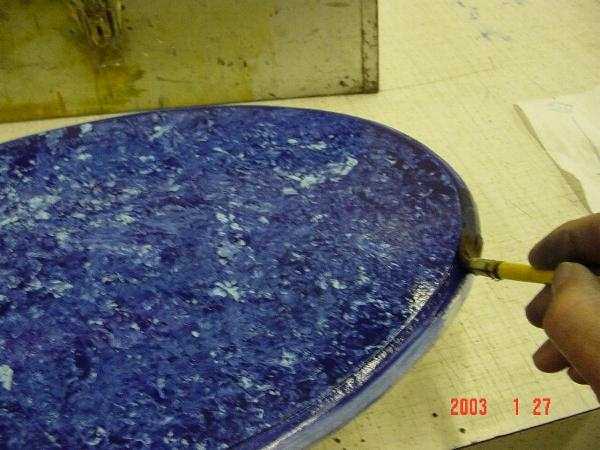
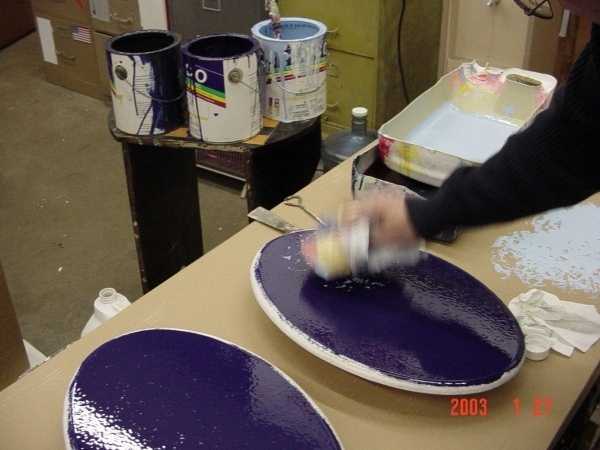
After I got the surface
I took a #20 quill to the routed part, painting it a dark blue. Now we
are ready for this to dry and to do our gold work.
I was planning to letter this
project by hand, but time being in short supply
and hindered by the humid weather. I decided to cut a
mask in signlab and apply the first coat of size that way. I will Powder
the vinyl before I apply the transfer paper with talc, and rub the board
with a cut Idaho potato.This will allow the mask to stick enough for the
size, but not damage my surface, I hope.
Notice how the potato made a film on the surface of the
board on the right.
this will wash off in the lettering after we apply the
mask, but will stay
on the board, to keep the gold from sticking. We used
to letter a lot of boats
with Gold Leaf, the old potato trick has saved my "posterior"
many times
The gold will stick, and you think it is really bad,
but a little water reacts with the potato starch and the gold washes right
off. There is a powder that Glantz sells that does the same thing, but
I have always used a potato. Its cheap and
readily available.
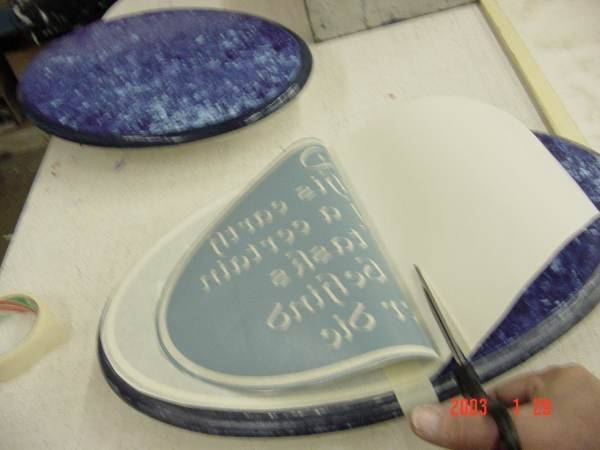
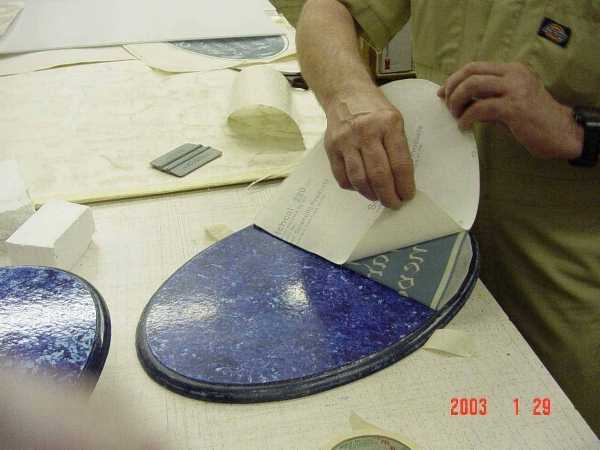
Once placed and taped in the center I apply the oval from
the center out to the right, by peeling back and cutting the backing paper
off and squeege down.
Then I remove it from the other side in the same manner.
Then carefully remove transfer paper.
I used wedgewood blue vinyl for my mask, mainly because
I hardly ever use it, and I had too much.
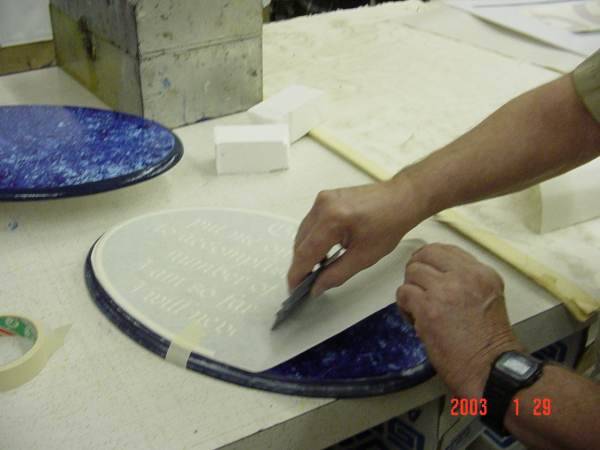
After the mask is peeled, carefully wipe out the letters
with an alcohol pad.
I applied the size with a #2
Langnickle red sable quill. I don't know if these are still available
but any red sable or Squirrel Tail (Camel Hair) Quill will do.
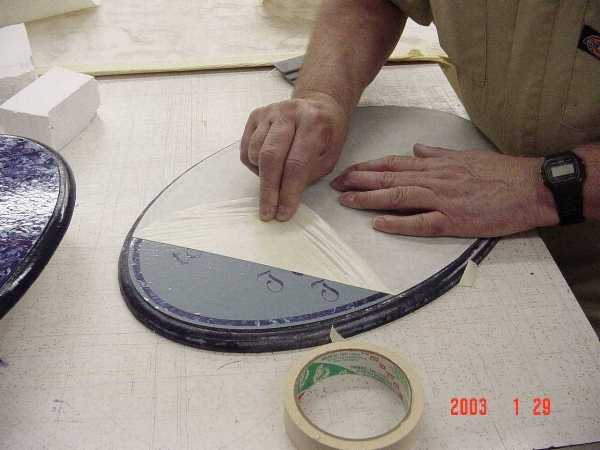
After I did the first one, I decided the size was not
visible enough, so I added just a small amount of oneshot gold for color.
Since I planned to handletter it with a second coat, I needed to be able
to see it better. However, these pictures are of the clear.
The polyurethane I used for
my size was exterior, boat grade and
the directions indicated that it takes 18 to 24
hours to dry for the next coat.
After I finished filling it in, I painted a long stripe
on one end of the oval as a test strip. This I will cover up with dark
blue when I am finished.
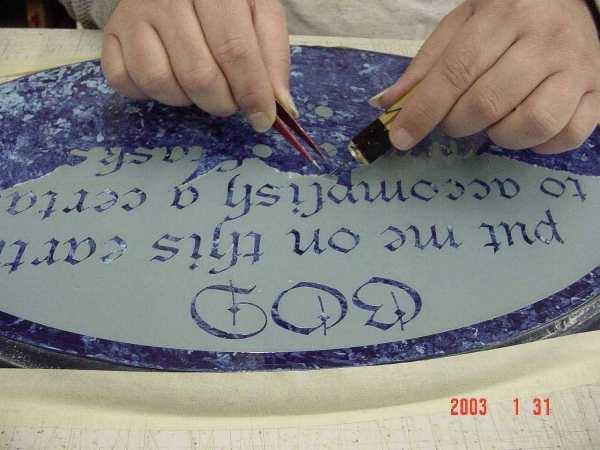
I use A Stencil knife, tweezers, and our handy pushtack
clothespin
for mask removal, (and my son Bill) notice the size hardly
shows, this is where
the gold color worked much better on the second one.(also
note the long guitar pick fingernails on my son. He plays a mean guitar!
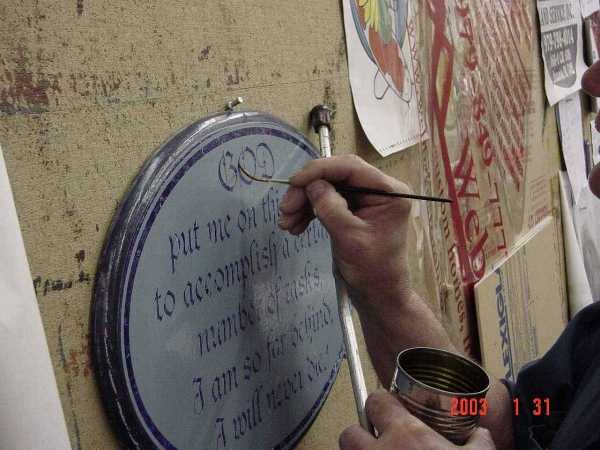
The One Shot gold is a little trick my Dad always used
that I had forgotton, but soon remembered after I lettered the second coat
of the first board, luckily I could see enough of this one to not make
too many errors.
I did this gold application after hours, so it was hard
to apply and take pictures
by myself, but if you are careful you can lay a minimum
of gold on the size by
holding over the letters and just pressing your finger
down on the backing paper
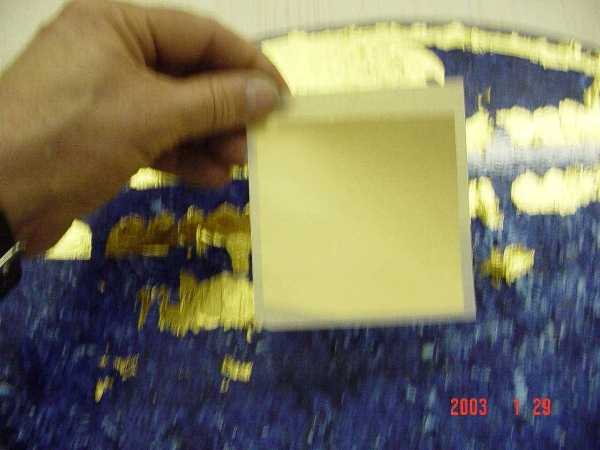
side of the patent gold as shown.
the above application was accomplished with 7 leafs or
pages of xx 23karat Patent gold ( I might add this is aged gold,
about 15years old)
or however long SignGold has been out.
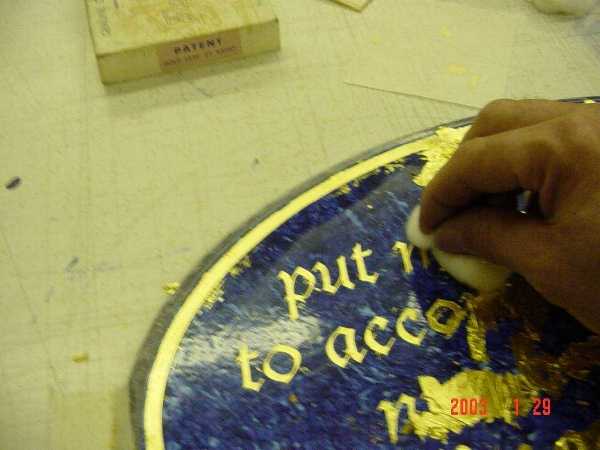
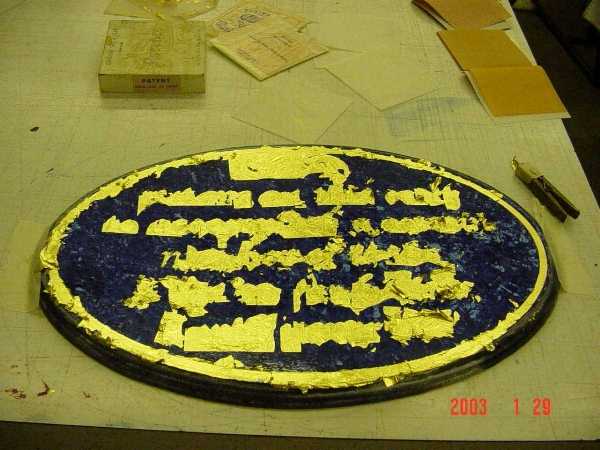
after the gold is applied remove excess with a couple
of cotton balls.
The potato juice will allow you to wash off any that
has stuck with just a little
distilled water, My dad used to stick cotton balls
in his mouth,
he said the saliva got it off better than water. However,
I had no problem
with sticking by using water.
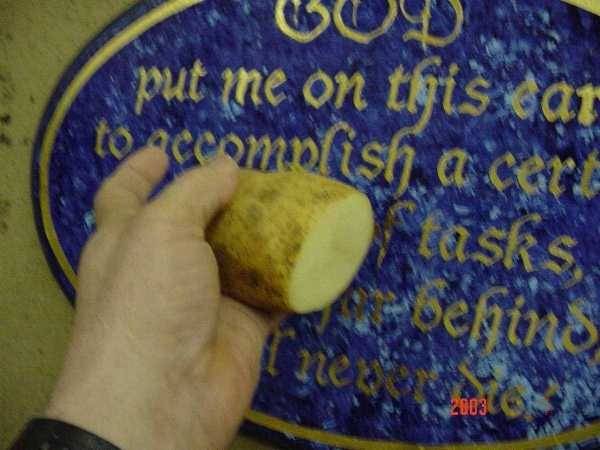
here is the potato I used before applying the size, I just cut off another slice, and applied again an let dry before doing my touch up size.
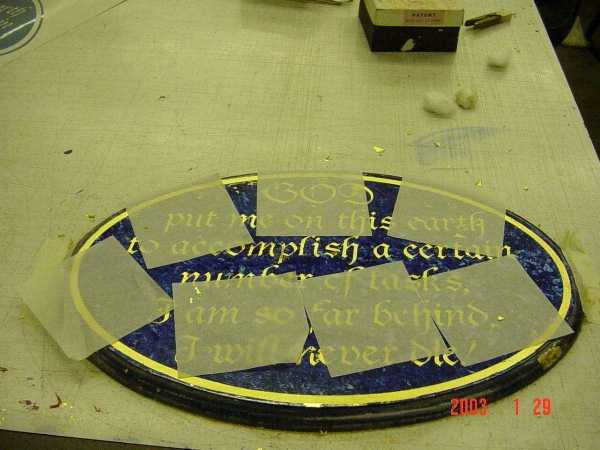
Now we are ready to touch up any excess gold and do the
edges
with dark blue again. And Hopefully get it shipped to
my
recipient in one piece.
And this is the final Results!
I hope my Recipient will like it.
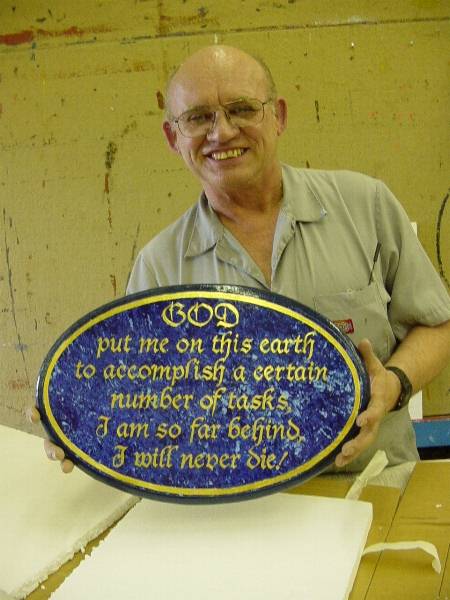
I made a duplicate in advance of this one, as a test,
and to save time if I made a mistake. I will hang it
in my office.
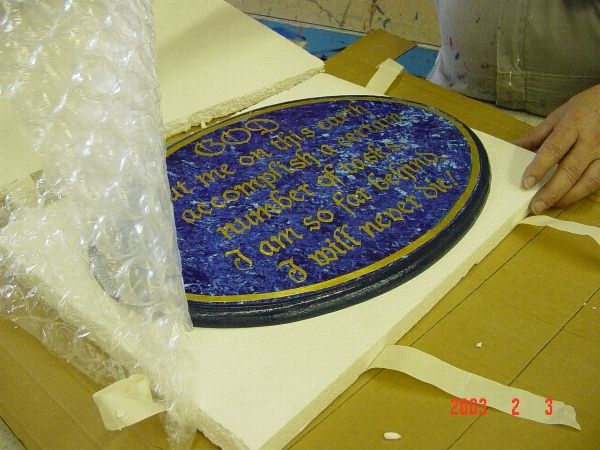
I packed this in two layers of 1 inch thick hi-density styrofoam® and used some bubble wrap on the surface. I made the foam one inch wider than the panel and taped them together. Then I wrapped this in cardboard and clear poly tape. I hope it makes it to Canada in one piece.
The photography on this project was done with a Sony
Cyber Shot, 2.0 megapixels DSC-P51 but was reduced
in size and sometimes quality for a more compact page.
Pictures were further reduced by a jpg optimizer.
Bill Biggs,
Art's Sign Service, Inc.
Clute Texas
Home of The Great Texas Mosquito Festival.